Due to the idea of the music video being rich in effects, I am bound to use the software
After Effects, however I am weak with this program in comparison to
Premiere Pro, so I decided to play around with it by trying out an effect that I'm hoping to use to get to know the software. The effect I wanted to try out was a '
mask' kind, where a certain area of footage is
masked so that the subject is isolated or cut out. I believe that the effect I got inspired from was also created via this method, or rather through a similar process.
For this task, I used one of Glass Animals' music videos
'Hazey' as I thought getting used to their style of music videos would allow me to work with the similar atmosphere to the song that I am originally going to work with.
I first created a new project in
After Effects and inserted the file
Hazey to begin editing it. I skimmed through the music video to see where I could apply the effect and decided to start from beginning. I thought that practicing this technique on a shoe belonging to one of the dancers was a good idea. This subject was a nice and basic shape to first practice with. Alternatively, the effect gives it some sort of purpose as the shoe is dancing and it is filled with these various patterns that support the movement of the dancer.
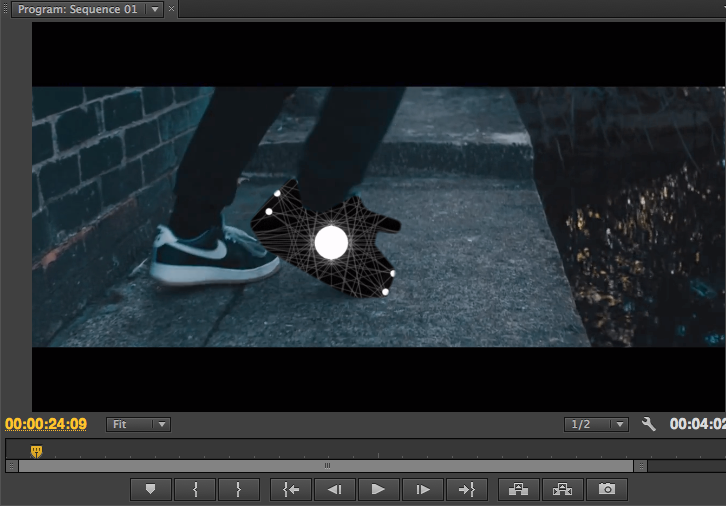
I dragged the file to the editing window on the left of the timeline in order for it to be editable. I expanded its settings until I found
mask. I ensured that I selected the
edit path section so that I could use the
pen tool from the tool menu and draw out the shoe's outline in the composition area. However, because the shoe kept dancing, its shape didn't remain the same throughout its
screening. This required me to use
keyframes and draw out the new outline of the shoe almost on every
frame. Nevertheless, each
point of the
mask flowed from its previous place to its next place between
keyframes, which gave it a nice flow to the result instead of suddenly switching from one mask to the next and appear glitchy.
 |
| Tool menu |
 |
| Settings of footage |
 |
| Key frames on timeline |
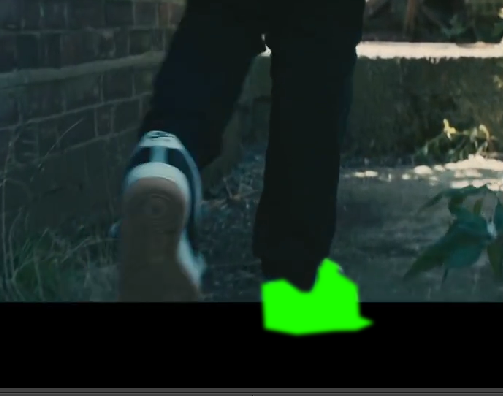
Once satisfied with the
masking, I filled the shoe with the basic green colour that is often used for
green screening. I had to do this by creating a new
solid layer that allowed me to create a layer filled with a certain colour as well as additional settings, but all I needed was a plain green layer. I placed this under the shoe layer so that the green appeared through the
hole I
masked. But when I reviewed the outcome, I noticed that at certain points the edge of the shoe showed up outside of the
mask, so I played around with this effects' settings and set the
feather to around 6.0, 6.0 pixels so that the edge looked more tidy and the entire shoe would be masked out.
 |
| Table with properties for new solid layer |
 |
| Solid layer |
 |
| Feather settings for mask |
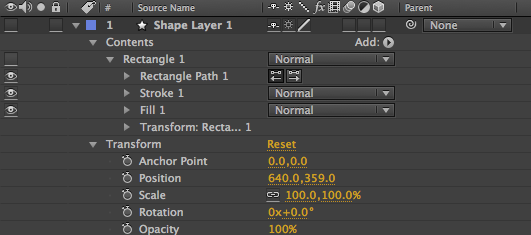
Another thing I issued with was the masking coming off the shot and showing up on the black border, so I decided to fix this by creating another new layer; this time
shape layer. This allowed me to create a layer containing a shape. I needed a black rectangle to mimic the black border and cover the
green mask that shows up at a necessary place. I drew the rectangle to its right dimensions so that it acted like the bottom border. This layer was placed above the shoe so that it hovered above the green mask.
 |
| Unappealing |
 |
| Shape's settings |
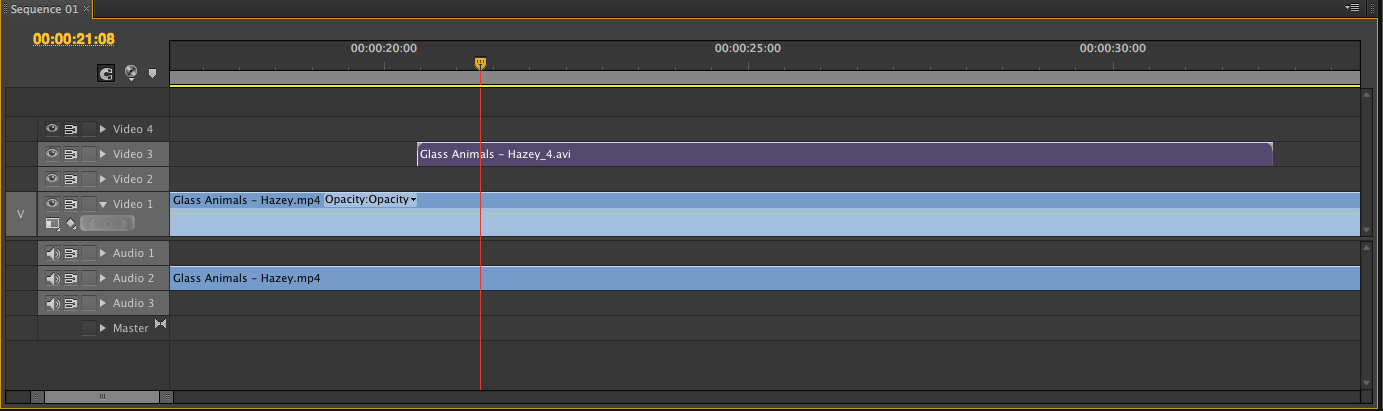
I wanted to reproduce this music video with some of my effects showing up throughout the video as a practice task. So, I
rendered the editing I have done so far in
After Effects and inserted this in
Premiere Pro and timed it correctly to the original that was imported to the sequence together with its audio. However, there was still some editing left. I used the
ultra key that I am now rather familiar with, and colour picked the green from the shoe using the
pipette tool. This masked out the shoe and created a hole in the footage. I could then put something beneath this layer so that something showed up through the hole. I have encountered many interesting and rather
trippy 3D animation gifs that were similar to the patterns used in the effect I was originally inspired from the song
Wasted My Time by I/O. I gathered some gifs and imported these into the project. I then inserted these into the sequence and played around with its scale and position as these gifs' dimensions were different to the music video. I focused the gif so mainly it was centred and followed according to the shoe. I did this using
keyframes for
position and
scale of each gif. I also wanted to see different gifs show up in the shoe so that I could see how each gif worked with the effect and how the overall result appealed. I timed these to the rhythm of the song so that the gif changed at every click and matched the music video better.
 |
| Timeline in Premiere Pro |
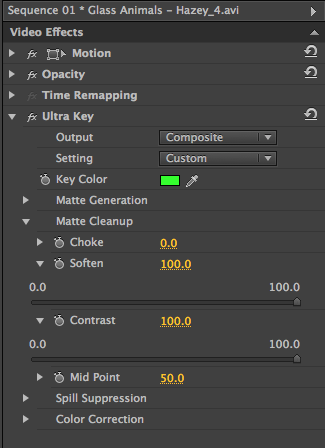 |
| Ultra key settings |
 |
| Timeline with gifs added |
 |
| Result |
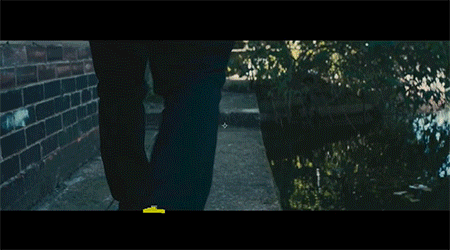
ORIGINAL
WITH EFFECTS
For some reason, when I introduced the edited version, the colouring slightly changed. It is slightly visible and I'm unsure of this issue, however I should try and avoid this next time this effect comes in use. I have also noticed that even with the black rectangle acting as the bottom border, the patterns of the shoe still slightly managed to leak over the edge, which also can be spotted when viewed from up-close.
I think what else I could have improved was the crispiness of the edge because the shoe still looked soft and a bit uneven. Now that I look back at the original effect I found from the music video
'Wasted My Time' by I/O, it would be more logical for the person to be dressed in green as though with the possible ultra key effect added, the creases still showed up and looked like the outfit was animated for real. I remember experiencing creases from my previous task where I was first introduced to green screening, and now that I think about it, the music video was possibly done using this kind of method.
For my music video, I won't be able to dress a cat, a dog or a horse in green, so I will have to be aware of where I put the points when masking them and get as close as possible to the edge so that the result is much more crisp.